
How to Paint by Diamonds
Getting Started with Paint by Diamonds
If diamond painting is something you have never done before, you might be interested in learning how to paint with diamonds. To put it more simply, it is a hobby that involves attaching many tiny “diamonds” made of resin to a canvas that has been painted with glue in order to create a glittering mosaic. Canvas, applicator tools, drills for the resin diamonds, and wax are all included in diamond painting kits. These kits have everything you need to accomplish the task. The activity of diamond painting is a straightforward and satisfying pastime that can be enjoyed by individuals of any age, whether they are looking to create personalized artwork or simply relax.
Choosing the Right Diamond Painting Kit
Before you begin, it is of the most importance to choose out the appropriate attire. When it comes to finishing smaller canvases, the majority of novices find it easier and are less afraid of making them. As you gain more self assurance, you will be able to go to designs that are larger and more sophisticated. Additionally, drills can be either square or round, depending on the kit. When compared to round diamonds, square drills are easier to use for beginners since they fit together better, giving the impression that they are superior. Some artists prefer to provide custom diamond painting packages, which gives you the opportunity to submit your own photograph in order to create a one of a kind piece of artwork. The process of painting diamonds can be made more enjoyable by using the appropriate equipment.
Setting Up Your Workspace
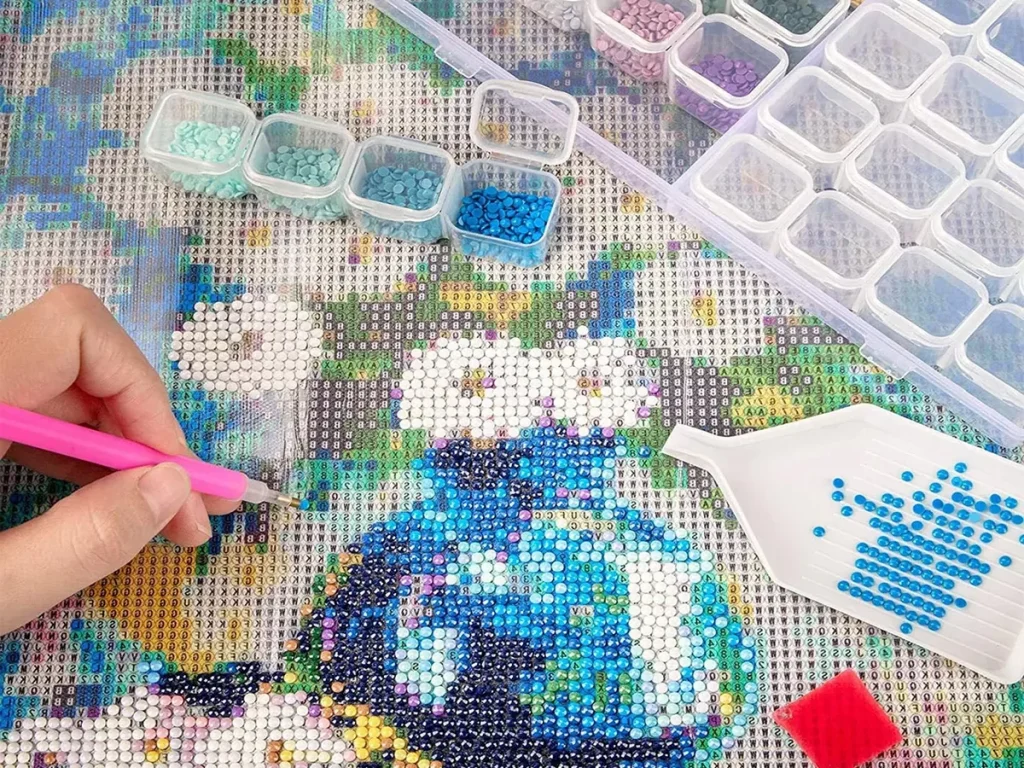
If you want to have a successful diamond painting effort, the first thing is to organize. You should choose a location that is both level and well lit, as this will enable you to work comfortably for extended periods of time. Spread out your canvas and secure it to a table or desk so that it does not move once you have finished painting. Make sure that your drills are stored in resealable bags, trays, or containers, and that they are arranged according to color. In the event that your colors are well organized, the process will proceed more smoothly, and there will be no accidents or misunderstandings. The installation of a light pad underneath the canvas to illuminate the coded symbols is something that many crafters recommend doing in order to make it simpler to examine and accurately position your diamonds.
Step by Step Diamond Painting Process
Once your workspace has been prepped, it is time to begin the process of learning how to paint by diamonds in a step by step manner. First, remove a little portion of the protective plastic layer that is on the canvas. Do not remove the entire sheet at once because doing so could expose the glue to potential contaminants such as dust or other particles. After that, dip the applicator pen into the wax so that it can easily pick up the diamonds without any difficulty. After establishing the suitable drill color based on the chart that is displayed on the canvas, place each diamond on the symbol that corresponds to it. It is important to work gently, row by row, and in increments until your design starts to shine. What makes diamond painting so captivating is the fact that it is a procedure that is both boring and peaceful.
Tips and Tricks for Better Results
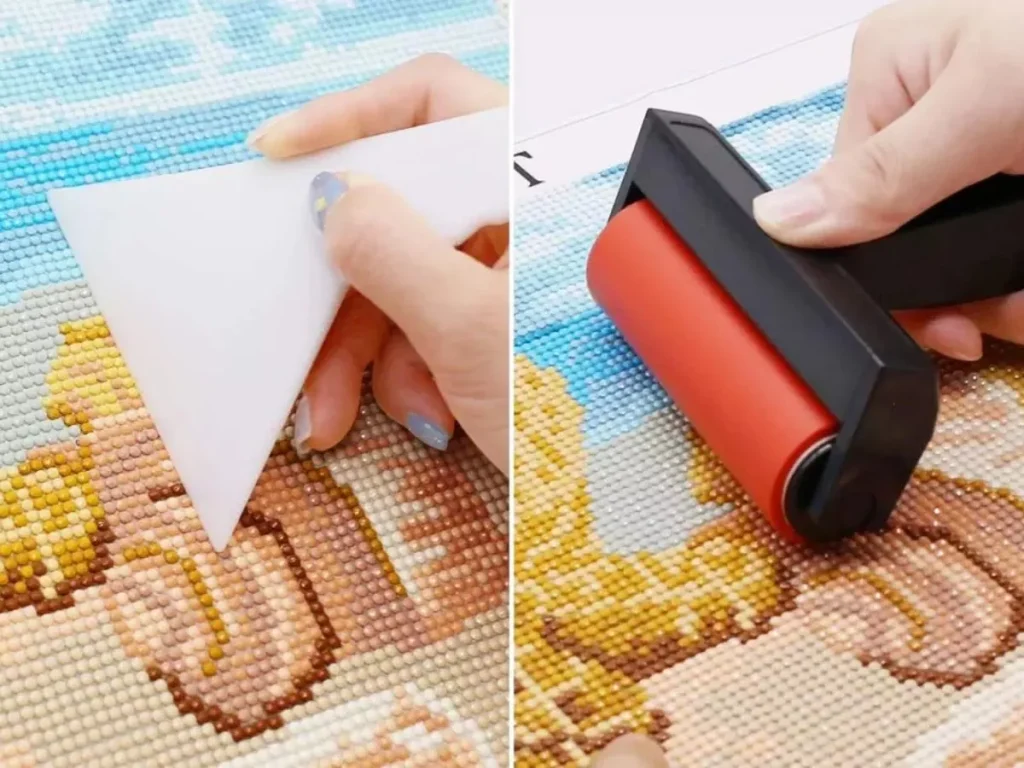
Despite the fact that painting with diamonds is a simple process, there are a few pointers that can make your artwork appear more polished. Always work in little parts to ensure that the glue retains its freshness and stickiness through the process. If you see that the lines are not straight, you can use tweezers or a ruler with a straight edge to carefully press the diamonds into position. A multi-placer tool allows for the application of many drills concurrently, which speeds up the process for larger canvas areas. After you have finished a section, you should use a roller to apply pressure to the diamonds in order to guarantee that they are properly attached. If you use these simple tactics, you might be able to achieve a flawless finish and rows that are clean and even.
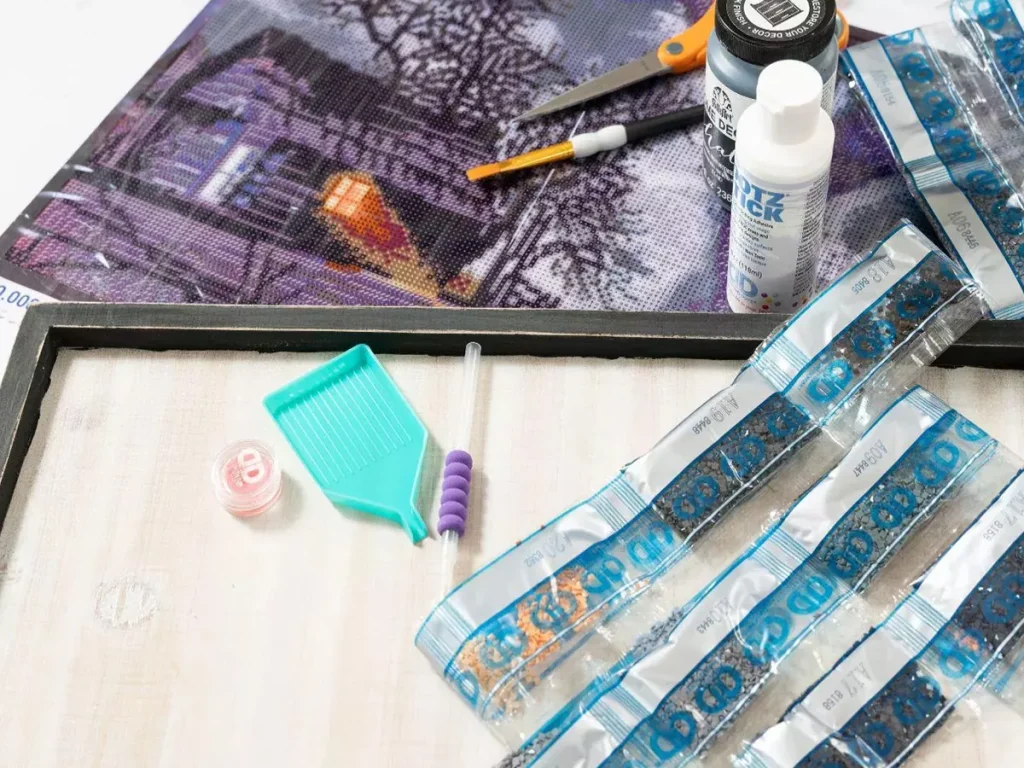
Finishing and Displaying Your Diamond Art
When you finally complete your first diamond painting, it is a pleasant accomplishment, yet, the fun has not yet ended. With the help of a transparent sealer, you can secure the diamonds in place while also protecting your artwork. When you frame your finished product in a shadow box or beneath glass, you not only protect it from damage, but you also make it easier to show it in your home. In addition, diamond paintings, particularly personalized ones that include images of the recipient, are fantastic presents for those who are dear to you. Investing a little bit of attention to detail and using your imagination will ensure that your diamond artwork will continue to shine brightly for many years to come.